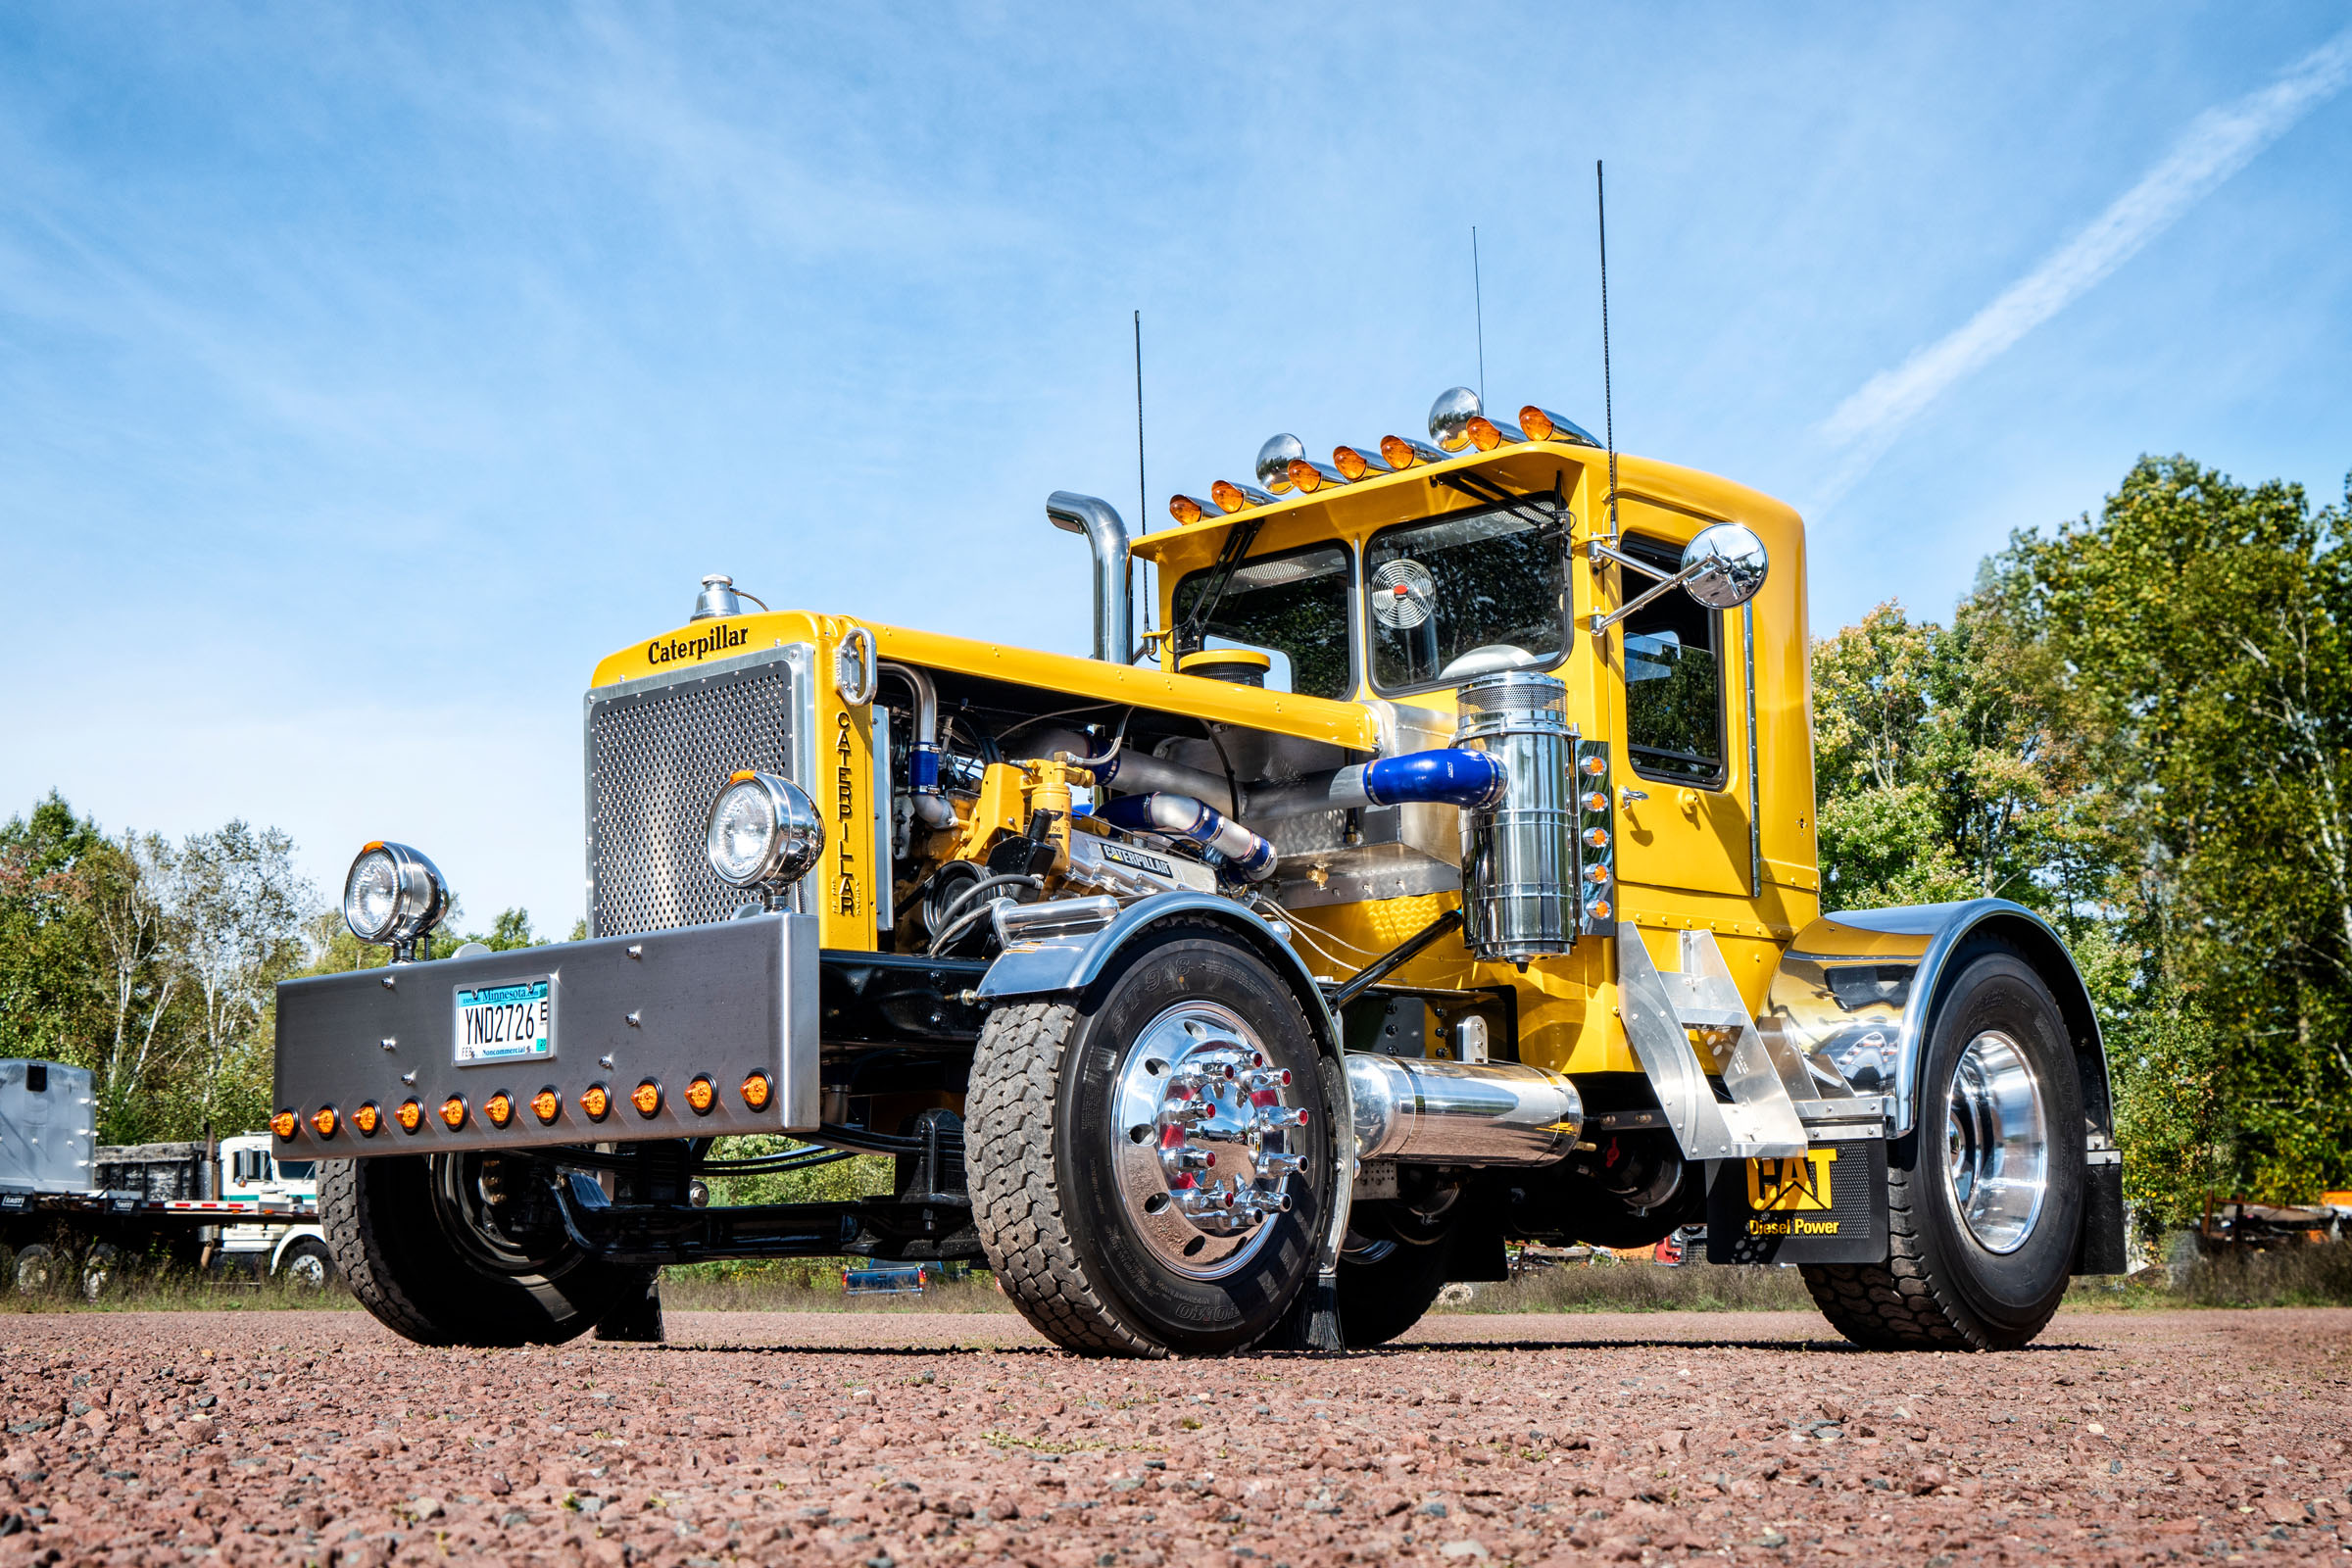
Last summer I had the chance to shoot some really unique automotive builds by a Wisconsin builder. The shoot was set to take place at his shop in rural Wisconsin and my client would be using the images for print, web, social media, etc. All of the builds at the shop were amazing, but this particular one stood out to me. It felt like it had a more polished Mad Max feel to it and I could imagine it flying across the desert kicking up dust.
The light we had to work with that day was harsh mid-day sun. Conditions like this can usually be a pain to deal with, but in this case I felt like it really lended itself to the look I was trying to pull off. After a bit of jockeying, we had the truck ready to shoot so we set up the camera. I captured the main base photo and then walked around with a remotely triggered mono light to accentuate certain parts of the vehicle. The next phase was bringing it all together in Photoshop.
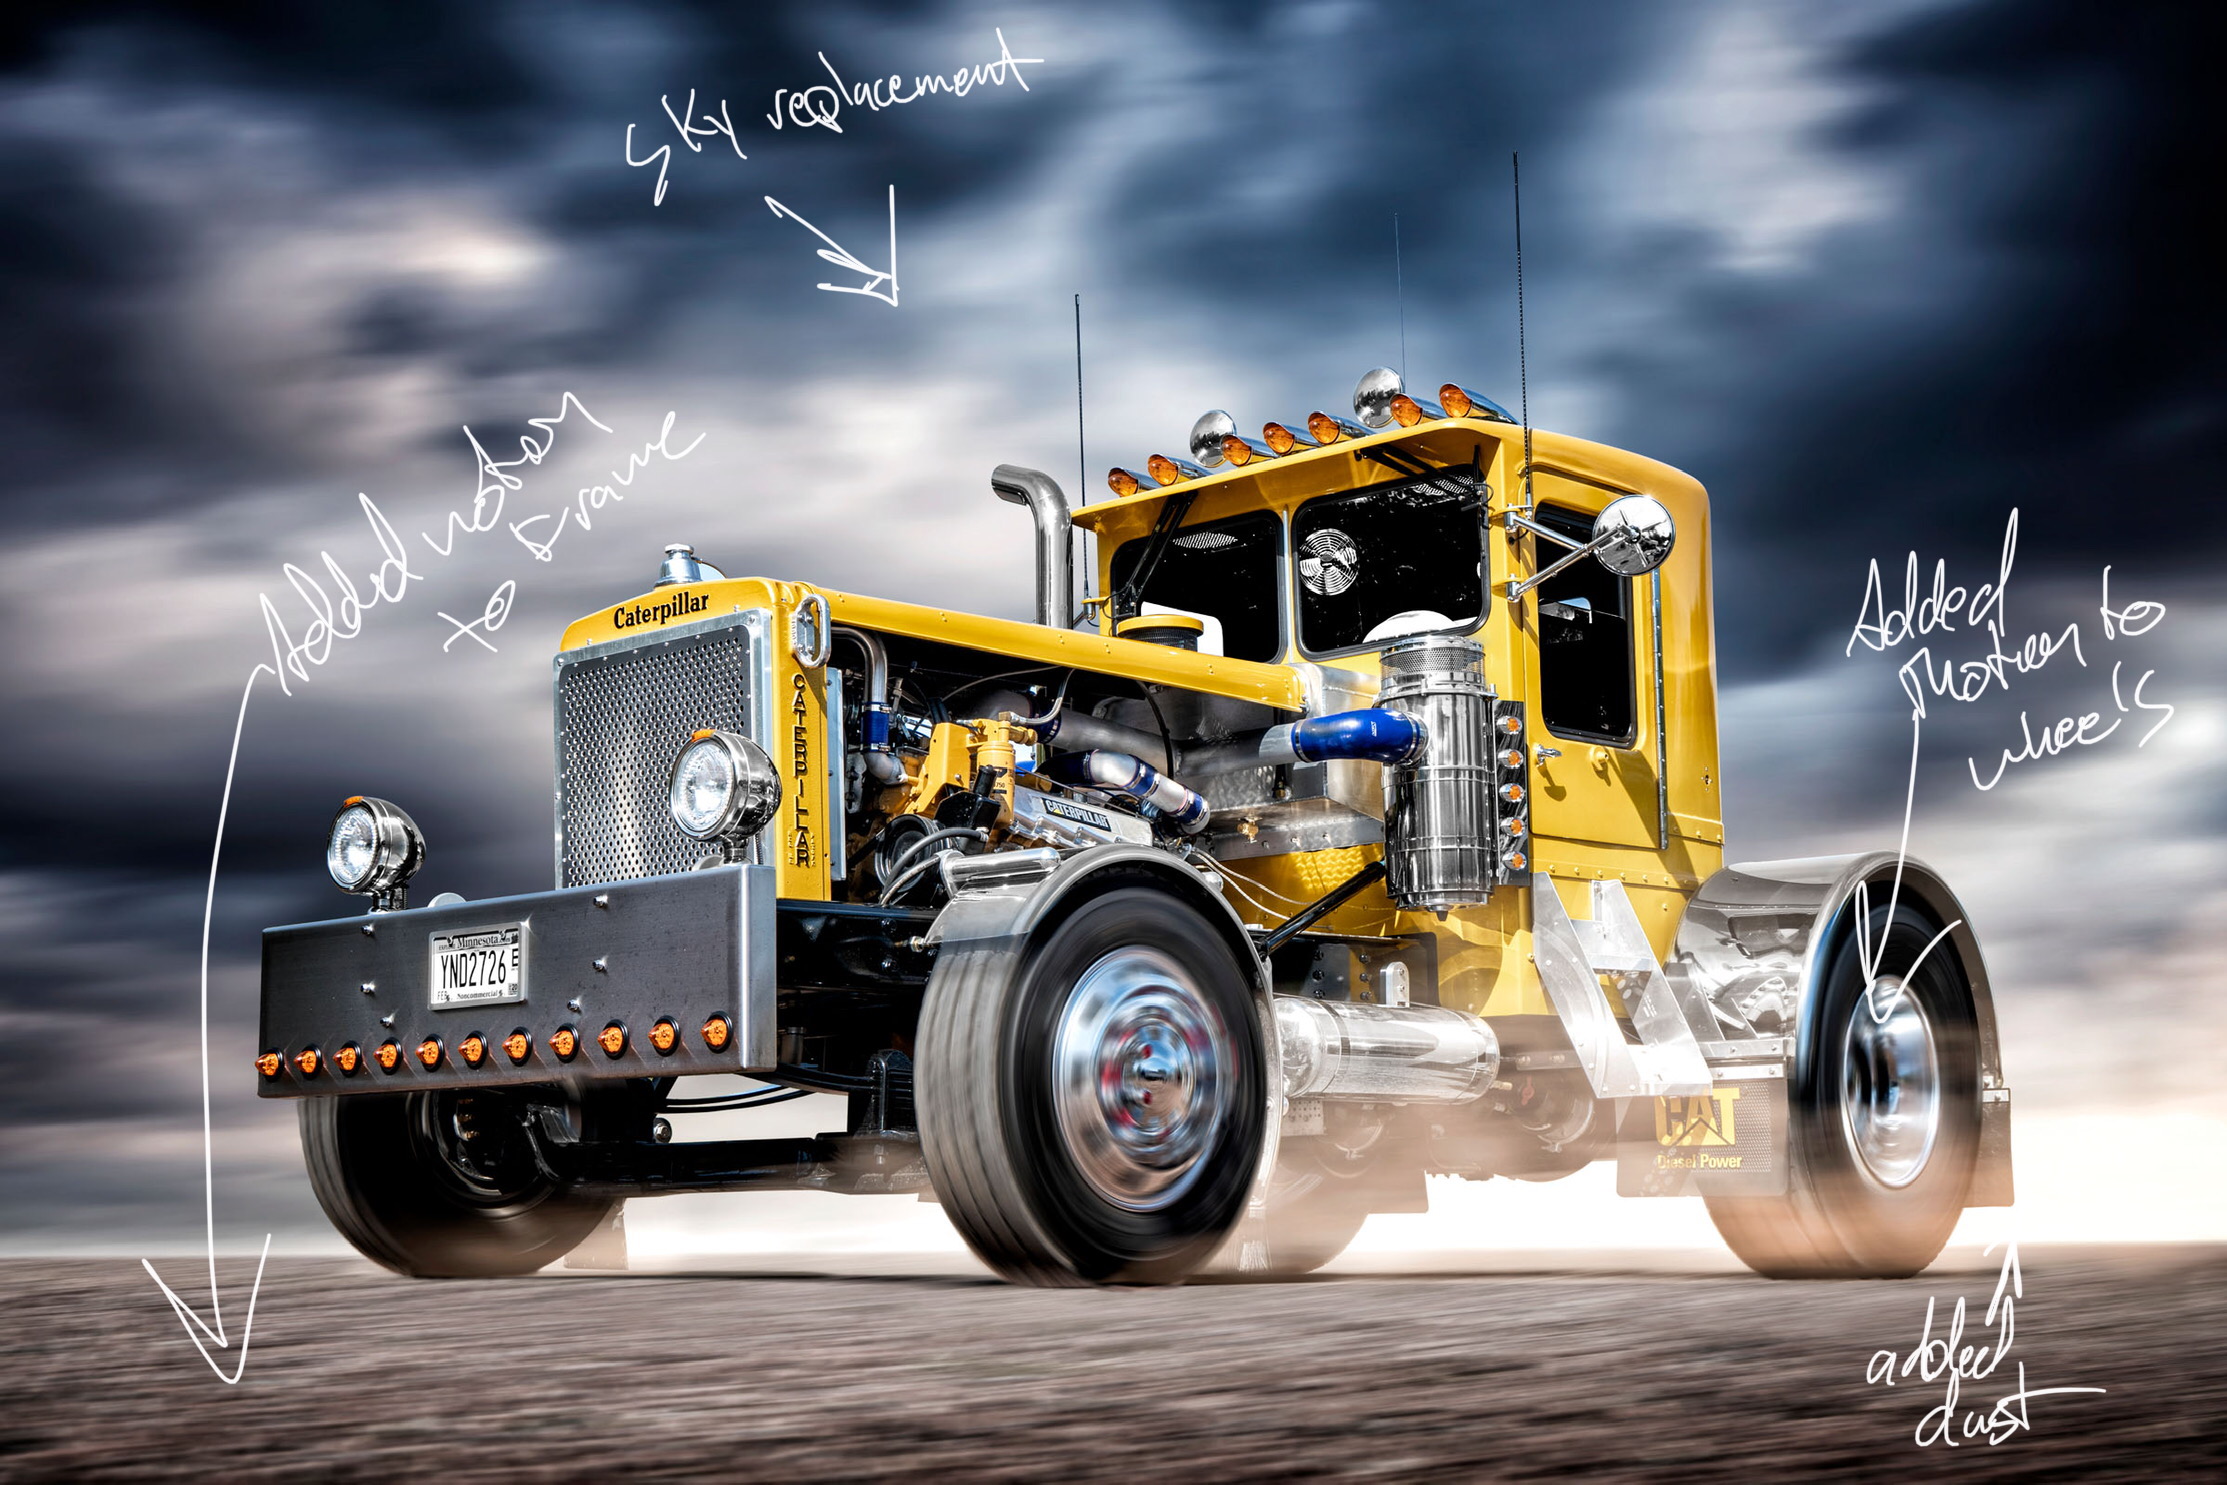
After combining the base layer and accent layers, I started creating a mask around the vehicle to separate it from the background. I liked the gravel surface it was sitting on, but the trees, trucks, and parts in the background had to go. Once everything was masked out, I picked a sky from my library to replace what was in the original shot. I wanted something sort of gloomy and dramatic. Since the photo was originally shot on a blue sky day, there was a lot of blue reflecting in the chrome of the vehicle. All of that needed to be removed.
At this point the feel of the shot was really coming together, but as I mentioned before, my vision of the shot was to see the vehicle racing across the desert. To get the look I was after, introduced directional motion blur to the background and foreground. I also created blur on thee wheels and tires. Finally. I added smoke to replicate dust and gave it some color to blend it in with the foreground. The final touches included some localized contrast and a slight vignette.
Be sure to swipe to see the before and after!
Before and After